Creating a pi glass exhibit
by Patio Plasma
First find a place where you can build such as a public sandbox.
To find a sandbox at the bottom of your screen hit
the search button then select "places" and type "sandbox".
This is summarized by the command list
search>places>"sandbox"
The search button is on the bottom bar, see the image below.
Making a cylinder
Click the "build" button on the bottom menu bar or type ctrl-4
A menu will appear with "Create" highlighted in yellow.
Select the cylinder, so that it becomes highlighted in yellow.
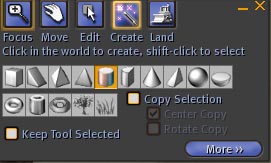
The cursor is a magic wand move it onto the ground and click once. (left click)
A cylinder made of plywood will appear. There will be a set of arrows with the cylinder.
Congratulations you have just made your first prim, a primitive shape.
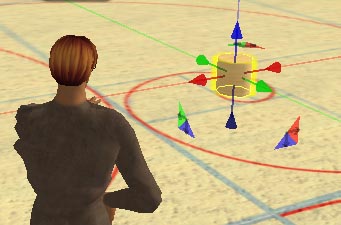
Click on the ends of these arrows and drag the cylinder wherever you would like it.
Back on the menu click the "more", button an extended menu will appear.
You can click on the top of this menu to drag it around on your screen, in particular you can drag it off to one side so you can see your work.
To automatically center your cylinder in your field of view type "h" and to zoom in to it type shift-h
To move your camera to where you want it to get a
good view of your object use the camera controls
View>camera controls then use the controls that appear in the blue
window.
or directly control the camera with keyboard shortcuts
alt-drag to move camera forward and back or to orbit around the item,
ctrl-alt-drag to orbit the camera around the point of view up and down as well as clockwise and counterclockwise.
and shift-ctrl-alt to slide the camera side to side and up down.
In the "General" menu immediately name your
object, mine is named "pi glass".
This step is really important. If you don't name what you are
building the object will be given the default name "object" and will
be extremely hard to find.
You should also set the object permissions, i.e. whether other people can move it, copy it or buy it.
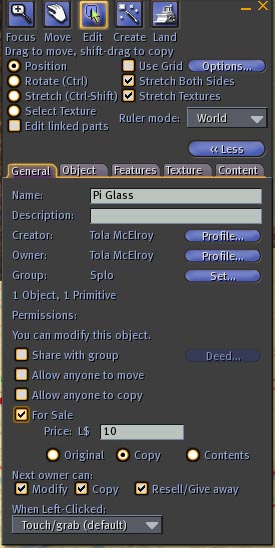
Click "Object" on the menu and you will see the x,y,z location of your object, as well as its x,y,z size in meters and its rotational position about the x,y,and z axes.
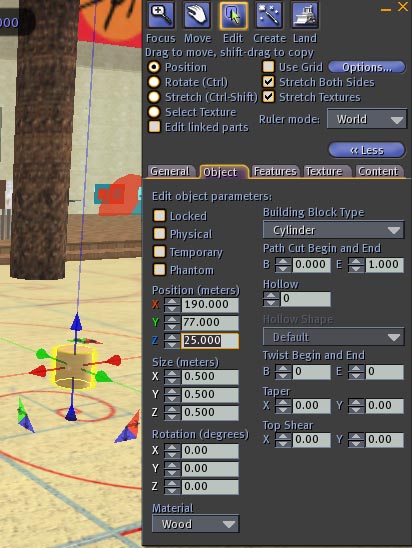
Make the dimensions of your cylinder x = 0.1 y =
0.1 z = 0.314.
As soon as you hit return after entering each dimension it will
change the dimensions of your object.
You now have a solid cylinder with a height equal to its circumference.
At the bottom left of this menu there is a
material selector drop down menu, choose "glass."
Nothing will seem to happen, however now when this object is dropped
it will make the sound of falling glass.
If you need to undo an action find the undo
command in the edit menu edit>Undo or type cmd-z
To redo the last Undo type cmd-y
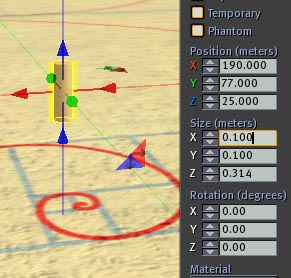
Planning ahead we are going to need to make a bottom to our glass. To do this
hold down the shift key while you use the arrows to drag the cylinder in the z direction.
This will create a clone of the original cylinder. The clone will have the same name as the original.
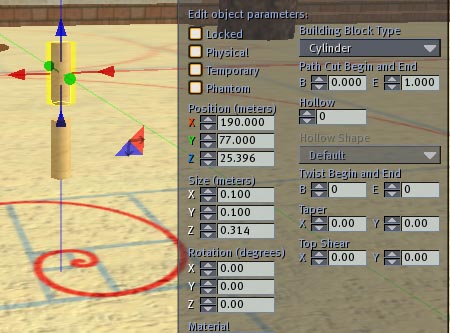
To make it into a glass on the right side of this menu enter 0.95 into hollow for the top cylinder only.(The maximum hollow allowed)
This will make a hollow cylinder.
For the bottom cylinder click on it, notice the arrows jump to this cylinder, and reduce its z size to 0.01 m. (The minimum value allowed)
You will now have a hollow cylinder, and a disk.
Texturing your glass
Now let's make the glass transparent. Start by clicking on the upper hollow cylinder so that the arrows appear attached to it.
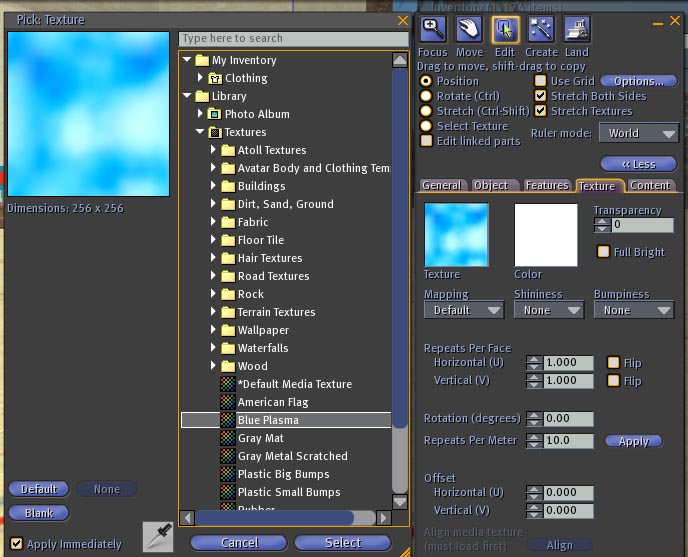
Click on the texture tab as shown highlighted below.
The texture shows as plywood. You could choose blank for your texture.
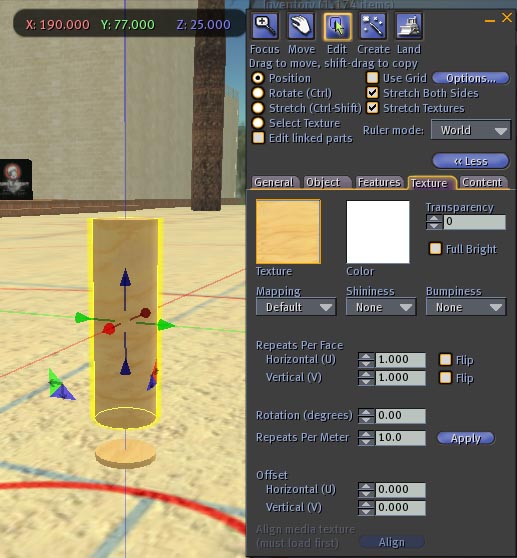
Or click on the plywood above the word texture and a Select Texture menu will come up. This will open up for you all the textures in you inventory.
Select one texture by clicking on it to apply it to your glass.
I used a texture named "Blue Plasma"
To the right of the texture is a color chooser. Click on the square above the word color and a spectrum of color choices is presented to you. Click on a color and notice the black cross, use the slider on the right to select an intensity for that color then click select and the color will be applied to the glass.
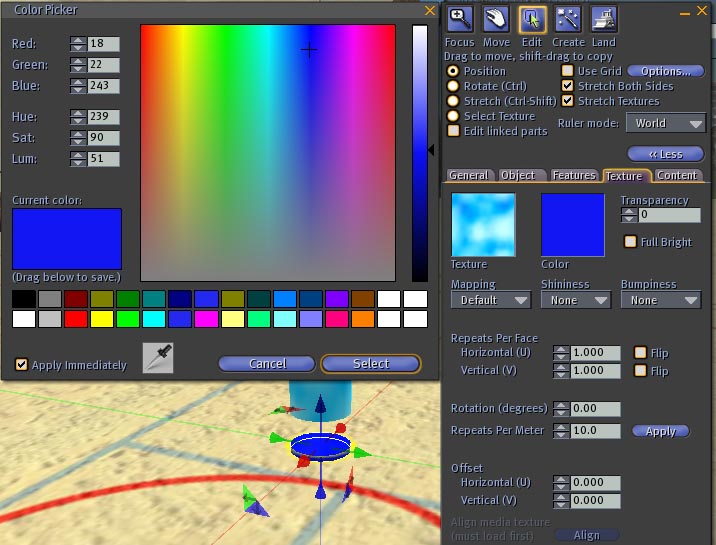
You can also choose the transparency of your glass I have chosen 30 % transparent.
Linking, Adding a bottom to your glass
Next texture your disk.
Then click on the disk so that the movement arrows are on the disk and drag it in the z direction until it becomes the bottom of your glass.
Next you will link the two objects together to make one glass.
The order you select objects is important the last object you select becomes the "root" prim.
First click on the bottom of the glass then hold down shift and click on the top of the glass. The top of the glass is selected last and is the root prim.
Go to the tools menu at the top of you SL screen
and choose "link". This is usually written tools>link,
or alternatively type ctrl-L.
You now have made a glass.

Close down the build menu by clicking the X in the upper right corner.
Look at your glass with the camera. Look all around it.
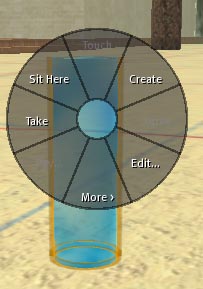
Now take it into your inventory, Command click on it or right click on it.
This brings up a pie menu.
Choose "take" and it will go into your inventory.
It will be in the objects folder.
You can find it by clicking the inventory button at the bottom of your screen and then selecting the "recent items" tab. inventory>recent items
This will show you only items you have taken into inventory since you last logged into SL.
Or you can select the "all items" tab and type piglass into the search field. inventory>all items>search"piglass"
Congratulations you've made your first exhibit.
Adding a Script to your exhibit
Perhaps you would like your script to give a notecard when someone clicks on it.
First you will have to make a notecard
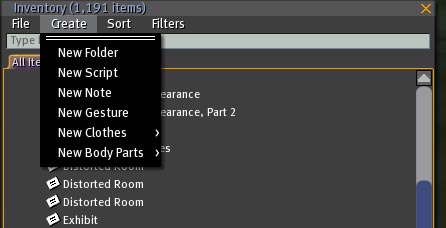
Open inventory and under the create tab choose
notecard.
Inventory>Create>notecard.
A notecard will appear in your inventory with the name "New Notecard."
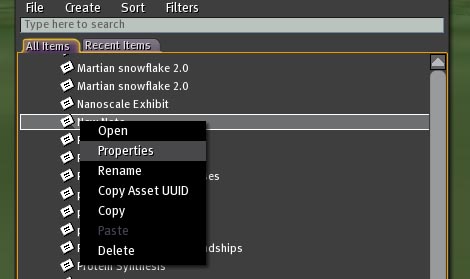
Right click on "new note" in inventory (Or command click for MAC) and choose "Rename"
Let's name it "Pi Glass." Then hit return.
While you are at it you can set its properties, right click on the newly named notecard again and select properties as shown above. A permissions menu will appear. For a notecard you probably want to make it "full permissions" and allow others to copy, modify and transfer it. But you may want to restrict them from modifying it.
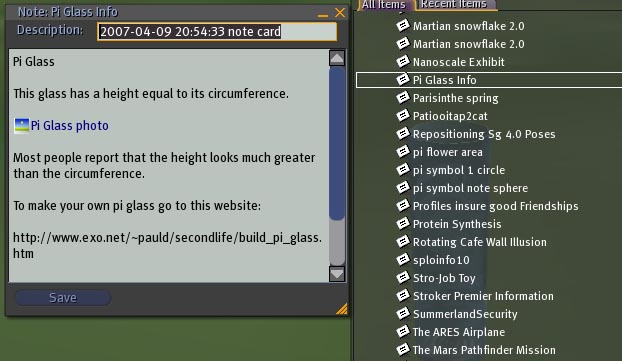
Next, click on the notecard so that it opens on your desktop. Then type your text into the notecard, or, copy and paste the text from a text editing program. (Note many users report problems copying and pasting to and from Microsoft Word in SL.)
You can also drag images into the notecard from your inventory as I did with an image of the pi glass. I could have, but did not, drag a landmark onto the notecard. I did enter a URL on the notecard so that someone could discover more information on a website.
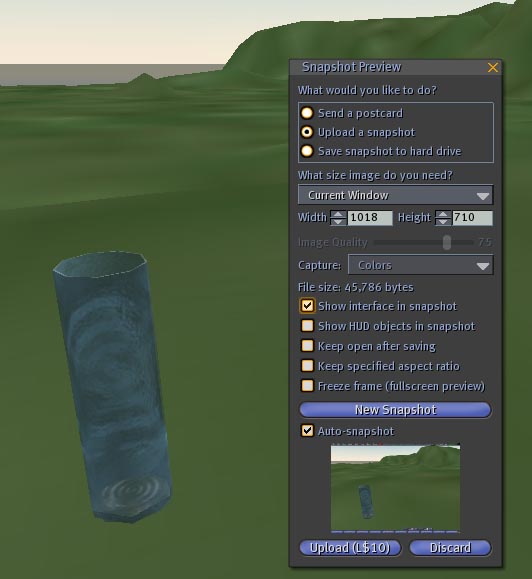
Digression on taking images.To take an image click the "snapshot" button at the bottom of your screen.
A menu will come up. You can send a postcard, upload the snapshot into SL, or save the snapshot to your hard drive. It will cost you $10L to upload each image. The other snapshots are free.
Rename the snapshot.
Inventory>Photo Album>right click snapshot>rename>"Pi Glass Photo"
After you have entered the text into your notecard click on the save button at the bottom.
Now that we have our notecard let's add a script to the glass to give this notecard to anyone who clicks on the glass.
Make a new script.
Once again in inventory click on the create tab and choose
script.
Inventory>create>script
You will be given a new window with a default script inside it.
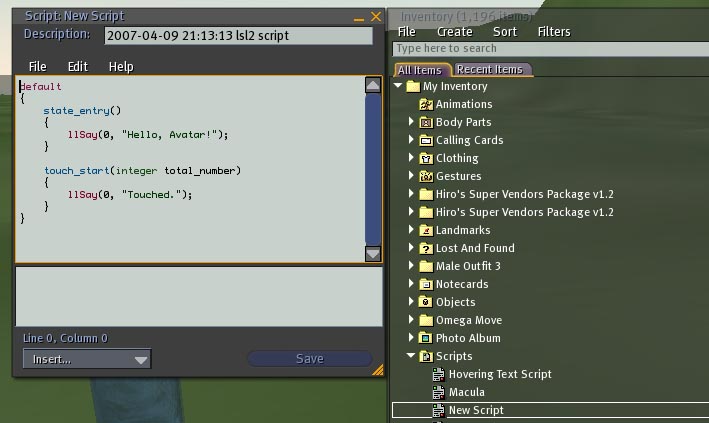
Immediately rename this script "notecard giver". Right click on new script> rename>type name.
Look at the script. This is the default script that will say "Hello Avatar" when the object containing the script is touched.
Replace the default program with this one: (Select all the text of the default script then copy the following text and paste it in, replacing the default script.
//place notecard name in My Notecard
default{
touch_start(integer total_number)
{
llGiveInventory(llDetectedKey(0), "My Notecard");
}
}
Replace the words "My Notecard" with the name of the notecard you wish the glass to give when touched.
In this case "Pi Glass Info"
This is very important. Before you do anything more click the "save" button on the bottom of the script window.
Wait while the script compiles. If everything compiles correctly, close the script window by clicking the red X at the top right of the window. If not find the syntax error, fix it, then save again.
You are now ready to put the notecard and the script into the pi glass.
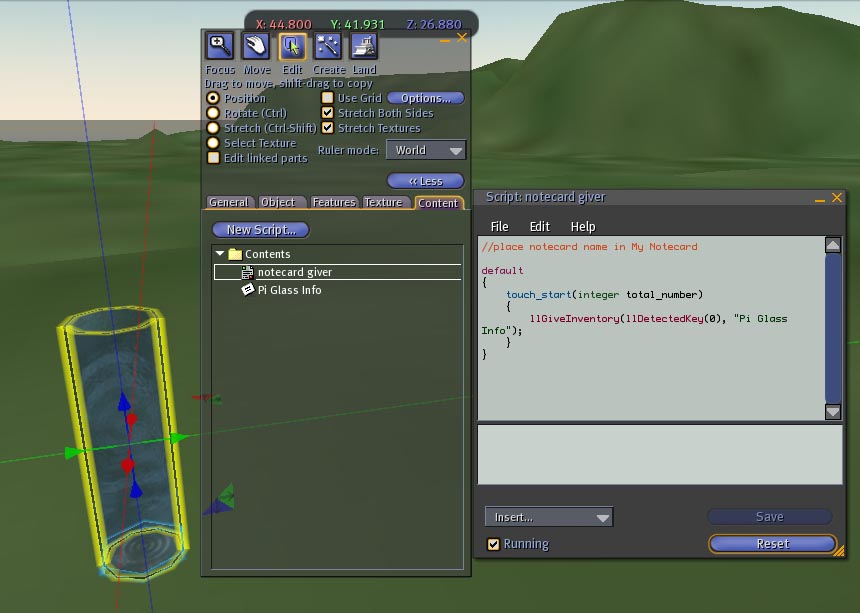
Right click on the pi glass and choose edit.
Click the content tab and drag the notecard giver script into the contents, drag the notecard named "Pi Glass Info" into the contents as well.
The name on the notecard must match the name in the script exactly including capitalization and spaces.
You might want to rename the glass "pi glass notecard giver". Edit>choose glass>General>Name: "Pi Glass Notecard Giver"
When you are done close the edit window by hitting the "esc" key or by clicking the red x at the top right of the edit menu.
Right click on the glass and "take" it into inventory.
You now own a glass with a working script that gives a notecard to everyone who touches the glass.
You now have most of the skills you need to build an exhibit in Second Life.
Have fun.
|
Scientific Explorations with Paul Doherty |
|
21 March 2007 |