A nichrome wire glows with incandescence.
The committee on apparatus invited me to present some of my electricity demos from the Exploratorium.
I did the following activities:
Blow Out Your Toaster
I began with slides of the new Exhibit "Blow Out Your Toaster" by Eric Thorgerson.
In the exhibit, visitors blow on an array of nichrome wires heated to incandescence by an electric current. Their breath cools the wires enough that they cease to glow.
Then I showed the snack version of this activity.
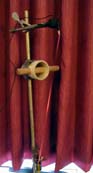
In the snack version I used a Variac power supply to heat a 24 cm length of nichrome wire to incandescence. This required a safe 24 volts of AC. Blowing on the wire darkened it.
Then I said that we wished to make the wire blow
on itself.
The audience looked at me questioningly.
I held a neodymium magnet near the wire while adjusting the tension
in the wire by pulling on the lower end. The wire sprung into the
second harmonic of transverse oscillation. The nodes of motion glowed
brightly while the antinodes became dark. The wire moved through the
air blowing itself to darkness.
The magnet exerted alternating pushes on the 60 cycle AC electric current in the wire. I pull on the wire to give it a fundamental frequency of oscillation of 30 hertz. The magnetic push then drives it at the second harmonic.
I asked for comments and Tom Rossing pointed out that Neodymium magnets were really iron boron neodymium if you named their elements in order. A good point. Another contributor asked how I was holding the magnet. I pointed out that it was important to place the magnet near the wire at a point that was not a node of motion.
For an even simpler version of this activity just
blow into a toaster!
Watch the internal nichrome wires grow dark.
Glowing Pickle
A decade ago, scientists at DEC published an article "On a New Organic Light Source," a pickle. I wanted to show people the glowing pickle and bring them up to date on glowing pickle research. But most of all I wanted to warn them about the dangers of doing this experiment and show them how to do it more safely.
As soon as I saw the original article I joined with Dave Nelson at the Exploratorium to examine the yellow glow from a pickle with 110 volts of AC across it.
Apply 110 volts to a pickle and after a few dozen seconds one end of the pickle will begin to flash yellow.
Next we sliced the pickle in half and laid the electrodes on the pickle. Steam rose from the pickle near the electrodes then after a gap of dry pickle had grown, sparks would flash across the dry open space between the electrode and the wet pickle flesh.
The project Star spectrometer showed these bright yellow sparks to be sodium light. Not surprising in a salt, sodium chloride, soaked cucumber.
I knew that 110 volts AC was dangerous and looked around for a way to make this demonstration safer. Don Rathjen and I came up with the idea of attaching a ground fault interrupt, GFI, to our glowing pickle demonstration apparatus.
GFI the ground fault interrupt works by measuring the integral of the electric current that flows out of one lead of an AC power source and comparing this to the integral of the current that returns. If any current is missing then the GFI shuts off the power. It does this in 1/40 of a second which is a time short enough to reduce the electric hazard to most healthy adults. Since the missing current may be flowing through the body of the demonstrator.
I also mentioned that one of our TI teachers had been so excited by the glowing pickle he had given it as an assignment to his class. One of his students had soaked the pickle in a potassium chloride solution for a week. The pickle then glowed pink from potassium! (Potassium chloride is available in the supermarket as "No Salt" salt substitute.)
During the comment section, one audience member told a story. He was interviewing for a job as a teacher at a high school and chose to do the glowing pickle demonstration. He was nervous and managed to attach the pickle to "hot" electrodes. He got a shock. He also got the job.
After our demo another teacher came down to get the details on how to install the GFI box on her lecture demonstration pickle apparatus and another came down to congratulate me on presenting demos with an emphasis on safety!
Bulbs and Batteries
This demonstration had two parts, using Christmas tree bulbs, AKA Newton's birthday December 25 bulbs, and using Don Rathjen's breadboards.
A great source of bulbs for physics teaching are the strings of bulbs available after Christmas at a price of 100 for $3 or less.
These bulbs are strung in series lines of 50 bulbs. When one bulb burns out a fuseable link in its base short circuits and the rest of the bulbs stay lit. Such a fuseable link is really an anti-fuse.
With 110 volts across 50 bulbs in series, each bulb glows with 2 volts across it. This makes them perfect for use in a physics classroom. I attached one of the bulbs to a battery holder with a single 1.5 volt AA battery. the bulb glowed dimly, but bright enough for use in a classroom. Then I attached the bulb to two AA batteries in series. It previous tests the bulb glowed brightly but somehow the batteries had been short circuited in my box and did not glow at all, such are the things that happen to physics demonstrators!
I also showed Don Rathjen's breadboard design. It is really a board with alligator clips or fahnstock clips screwed to it. This allows students to make series and parallel combinations of bulbs and batteries and to then measure the voltages and currents in the resulting circuits with voltmeters and ammeters.
Aluminum Air Battery
I showed slides of the Aluminum Air battery. This battery using only salt water, aluminum foil and water produces 1 volt at over 0.1 amp. This is enough power to turn a motor unlike any other salt water battery!
I had the parts on the table in front of me but had no time left to demonstrate it.
I mentioned that the Japanese Teachers group Galileo Circle had showed this battery to us in 1995. They used Japanese Charcoal. when we tried to use American charcoal the battery did not work. Two years of investigation finally showed that the Japanese used a different process to manufacture charcoal. Their process actually made activated charcoal. When we substituted activated charcoal, available at an aquarium store as a filter material, the battery worked just fine.
During the question period one professor astutely asked the question I had asked myself, how did the battery work? I mentioned that the aluminum foil was separated from the charcoal by a wet paper barrier, the top of the charcoal was dry. The upper aluminum did not participate in the reactions of the battery the lower aluminum did.
Metal Detector
I mentioned that during one of our summer workshops a teacher wanted to build a metal detector, in particular a metal detector that worked like the ones that triggered stoplights.
One day, while teaching a class using a Radio Shack Amplified Speaker Module I attached a telephone pickup coil. The coil let me pick up the magnetic radiation from power lines, overhead projectors computers and cathode ray monitors. When held next to the output speaker the pick up coil produced a squeal of feedback. When aluminum foil was introduced between the speaker and the pickup, the frequency of the feedback went up. This is what happens in a metal detector. When I held steel near the pickup the frequency decreased.
I asked for final questions and finished up just on time.
At the time I thought I hadn't covered much, but now that I've written it up it seems that I did introduce a few new variations on older ideas.
|
Scientific Explorations with Paul Doherty |
|
15 January 2001 |